A very convenient way to log into remote systems via ssh is without the use of passwords. Here it is very important not to share your private key with anyone. Currently, when trying to connect, I am asked for the password to the server:
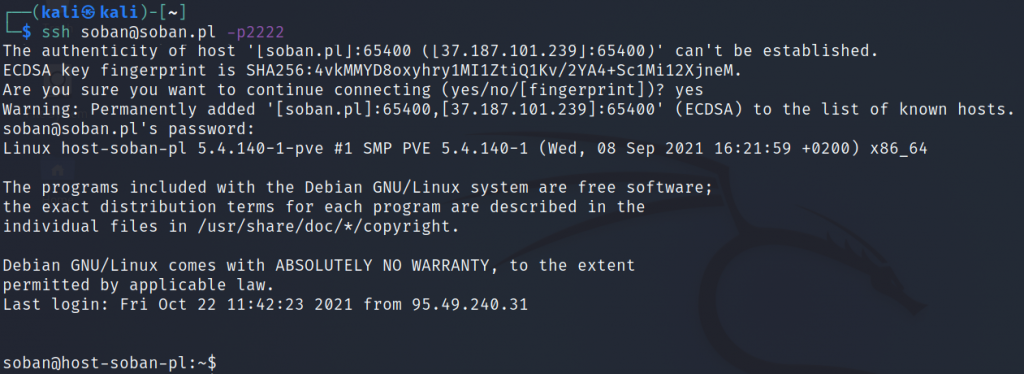
ssh connection to remote host
Shell
1
$ssh soban@soban.pl-p2222
During the connection, we will be asked if the fingerprint is correct. Then enter the user password that is set on the remote server. During the ssh command ‘soban@soban.pl -p2222‘ I gave the username ‘soban‘ then the domain ‘soban.pl‘ and ‘-p2222‘ port ‘2222’. The default port after ssh is 22, but in this case I changed it so that it does not come out on scans – this increases security as often bots / hackers look for port 22, which is the default ssh port set.
Let’s move on to generating the key and copying it to the server:
Shell
1
$ssh-keygen-trsa
This is how the key generation looks like, I hit enter for each question:
As a result, a private key was generated: (/home/kali/.ssh/id_rsa) and a public key (/home/kali/.ssh/id_rsa) that we will place on the remote server:
The last time we log in to the server by entering the password. When logging in, we will not be asked for a password now. This way we are able to add our public key (.ssh / authorized_keys) to the remote server.
Some time ago I noticed that my wordpress hacks are being hacked by logging into the backend of the website. A bot or a hacker is trying to do this using a set of passwords. I decided to secure the website’s backend by requiring additional authentication. In nginxe we can set this up by:
We still need to provide the username for authorization and save to the file (/etc/nginx/.htpasswd) as we entered in the nginx configuration file. In “my_user_name”, replace the login of the user with which we will be authorized.:
user name nginx
Shell
1
# echo -n 'my_user_name:' >> /etc/nginx/.htpasswd
And the encrypted password has been set by openssl:
set encrypted password for nginx
Shell
1
# openssl passwd -apr1 >> /etc/nginx/.htpasswd
Openssl will ask you to come up with a password and enter it twice:
As a result, we will get a file with an encrypted password:
Before reloading nginx, we do a configuration verification:
service nginx configtest
Shell
1
# service nginx configtest
If everything is set correctly, we should receive the following message:
Now we can restart the service nginx:
Shell
1
# service nginx restart
The final verification will be to log in to the backend (e.g. www.example-page-wordpress.pl/wp-admin/), as a result, we should be asked for the login and password that we created above:
This is a simple trick to protect your wordpress from bot attacks. However, it should be remembered that we do not share passwords with anyone and setting default usernames and simple passwords is asking for a problem.
It often happens that we have to catch a given message, e.g. “error” while browsing the logs. Alternatively, we look for the occurrence of a given phrase in the old files. Both “tail” and “grep” are very useful for this. Especially if the logs are set in verbal mode, where there is a lot of messages in the log. We can also exclude certain phrases after parsing the information set. It is enough to use grep properly.
Let’s start by looking at all nginx logs.
In this case, sorting from oldest to newest is very useful as we know where to find the newest log entries:
Shell
1
2
# cd /var/log/nginx/
# ls -ltr *
If we are interested in the latest data, we will focus on the access-soban.pl.log file.
I know that my website is monitored by uptimerobot.com and I would like to find out, for example, from what IP address the website gets a query, e.g. to add it to the firewall as trusted:
Shell
1
# grep -i uptime access-soban.pl.log
As you can see, in this case, the bot that is querying the server has the IP address: 208.115.191.21. If I wanted to see all calls from this IP address, I could view them this way:
Shell
1
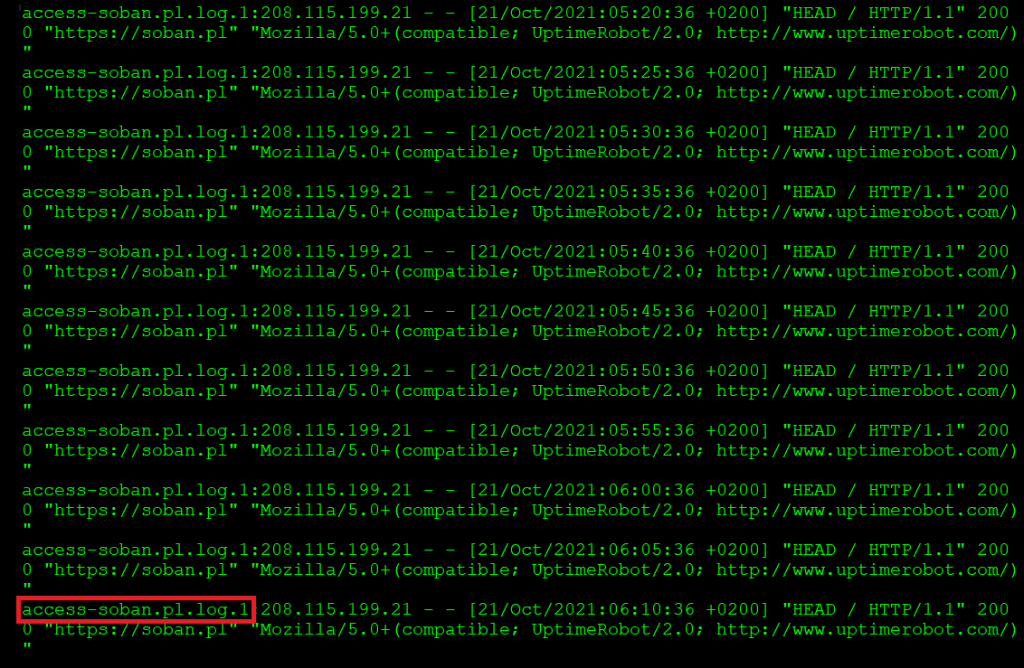
# grep 208.115.199.21 access-soban.pl.log* | less
If I press (shift + g) I’ll go to the bottom of the log:
It is worth noting that in this case the file in which the query is located is also given.
Now suppose I would like the logs, but without the “uptimerobot“:
Shell
1
# grep -v uptimerobot access-soban.pl.log* | less
This way all queries containing the word “uptimerobots” were cut. We can of course diminish the output from the console more by adding “| grep -v” possibly. Let’s cut out “sitemap“:
After packing the file, we can send it to another person. Sensitive data, such as inquiries or logins, can be cut using grep, as we did above.
Now let’s move on to one of the most useful tools for watching live what happens when someone enters a page:
Shell
1
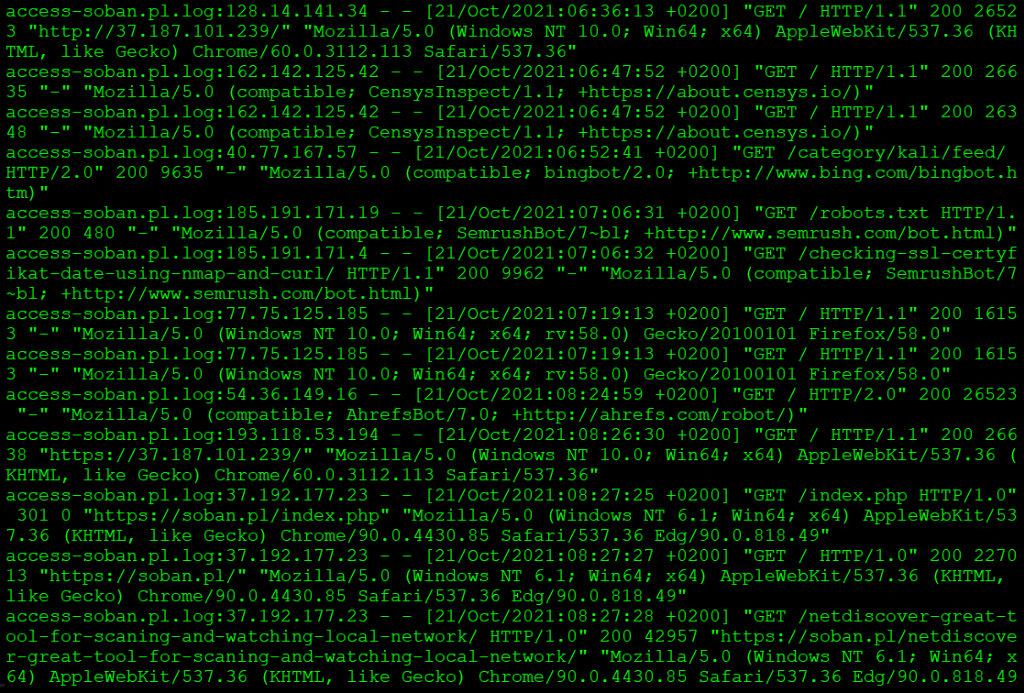
# tail -f *.log
At this point it is worth noting that we “caught” the logs from the files: “access-soban.pl.log” and “error-soban.pl.log”. However, the “error-soban.pl.log” log is empty, so its content is not shown below. However, if something came up, we would see the contents of the updated file on the console.
Useful at this point is to combine grep and tail. We’re assuming we don’t want uptimerobots to bump into our consoles while observing the logs, so we’re going to cut them like this:
Shell
1
# tail -f *.log | grep -v uptimerobots
The given examples can be modified in any way. I encourage you to use it in various combinations of tail and grep, especially in situations where erros/warning are repeated. Of course, not only in nginx logs you can use these commands. In all logs where we operate on text, be it system or application. Passing the text mentioned above is very helpful.
Netcat, also known as “nc,” is a versatile networking tool that is commonly used in Linux and other Unix-like operating systems. It is a command-line utility that can be used for various network-related tasks, such as port scanning, file transfer, and even as a lightweight web server.
The primary function of Netcat is to create network connections between two hosts, allowing data to be transferred between them. It can establish a connection as a client or a server, and it supports both TCP and UDP protocols. This makes it useful for testing network services, troubleshooting network issues, and performing security assessments.
Netcat can be used to scan for open ports on a remote host, allowing system administrators to identify potential security vulnerabilities. It can also be used to transfer files between hosts, similar to the way that the “cp” command works in Linux. Additionally, it can be used to create a simple web server, allowing files to be served over HTTP.
One of the key features of Netcat is its ability to operate in both interactive and non-interactive modes. In interactive mode, it acts like a chat program, allowing users to communicate with each other in real-time. In non-interactive mode, it can be used as a background process that quietly sends or receives data without any user interaction.
Overall, Netcat is a powerful and flexible tool that can be used for a wide range of networking tasks. Its simplicity and ease of use make it a popular choice among system administrators, network engineers, and security professionals.
Sometimes network connections are blocked by various network devices. In the verification of the connection over TCP, we can use, for example, telnet. After all, before we start a server-side service like jboss, we can use a simple utility like netcat to open the port.
In this example we will be using two machines. However, one of them is “host-soban-pl” with the IP address: 10.10.14.100:
Shell
1
$ipa
The second is “soban-pl” with the IP address: 10.10.11.105:
Shell
1
# ip a
Below, for example, I will show you how to check an already open tcp connection and one that is closed. On the other side, on port 80, I have an open port with nginx:
Shell
1
$telnet10.10.11.10580
Nmap below confirms port opening, additionally identified the service as http:
Shell
1
$nmap10.10.11.105-p80
The conclusion is that the service has network transitions and you can correctly connect over TCP. Now it will try to open a connection that does not exist, e.g. on port 81.
Shell
1
$telnet10.10.11.10581
As you can see, the connection is not possible because the port is closed. The assumption is that the port may be open, but for example the firewall blocks it. Then you need to set the appropriate rules on it.
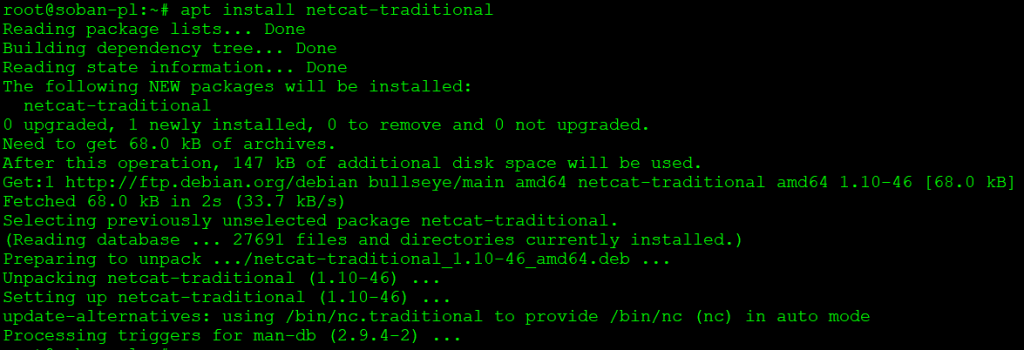
After all, in this case I know that the firewall does not block anything, so it will try to open the port with netcat. First we need to install netcat in debian, it is done like this:
Shell
1
# apt install netcat-traditional
Now let’s move on to running netcat on port 81:
Shell
1
# netcat -l -p 81 &
In this case, I specially gave the command ‘&’ at the end to leave the netcat process in the background. At this point, netcat is listening on port 81.
Now we can proceed to checking the correctness of the connection with the use of telnet:
Shell
1
$telnet10.10.11.10581
In the meantime, on the server machine, we can use the netstat tool to verify the connection and check from which machine the traffic is coming:
As you can see, a correct connection from the 10.10.14.100 host has been established with the server on 10.10.11.105 on port 81.
To end the call, hit ‘^]‘ (ctrl +]), then type quit and enter.
In this way, we can verify the correctness of the network connection and whether any firewall or other network problem is an obstacle to its correct establishment. Netcat is a very powerful and useful tool, you can use it to transfer files etc. Netstat is also very useful in situations where network congestion occurs and one of the hosts is attacked. It is then easy to notice that a large number of network connections are made.
Netdiscover is a popular network discovery tool that is used in Linux to identify live hosts on a network. It sends ARP (Address Resolution Protocol) requests to the network and then listens for replies from active hosts. By analyzing the replies, Netdiscover can build a list of all hosts that are currently active on the network.
Netdiscover is typically used by network administrators to identify all devices on a network and to detect any unauthorized devices that may be connected. It can also be used to identify the IP address of a device on a network that is not responding to conventional network scanning techniques.
Netdiscover is a command-line tool and has a range of options that allow it to be customized for specific network environments. For example, it can be set to scan a particular subnet or to use a specific network interface. Additionally, Netdiscover can output its results in a range of formats, including CSV and XML, making it easy to integrate with other tools and applications.
Overall, Netdiscover is a useful tool for network administrators who need to identify all devices on a network and detect any unauthorized devices that may be connected. Its ability to output results in a range of formats and its customizable options make it a versatile and valuable addition to any network security toolkit.
Netdiscover is a great tool to scan your local network for locally attached devices. It is installed by default in Kali Linux. However, if you want to use it on a raspberry pi, you need to install it. You can do this as follows:
Shell
1
# apt install netdiscover
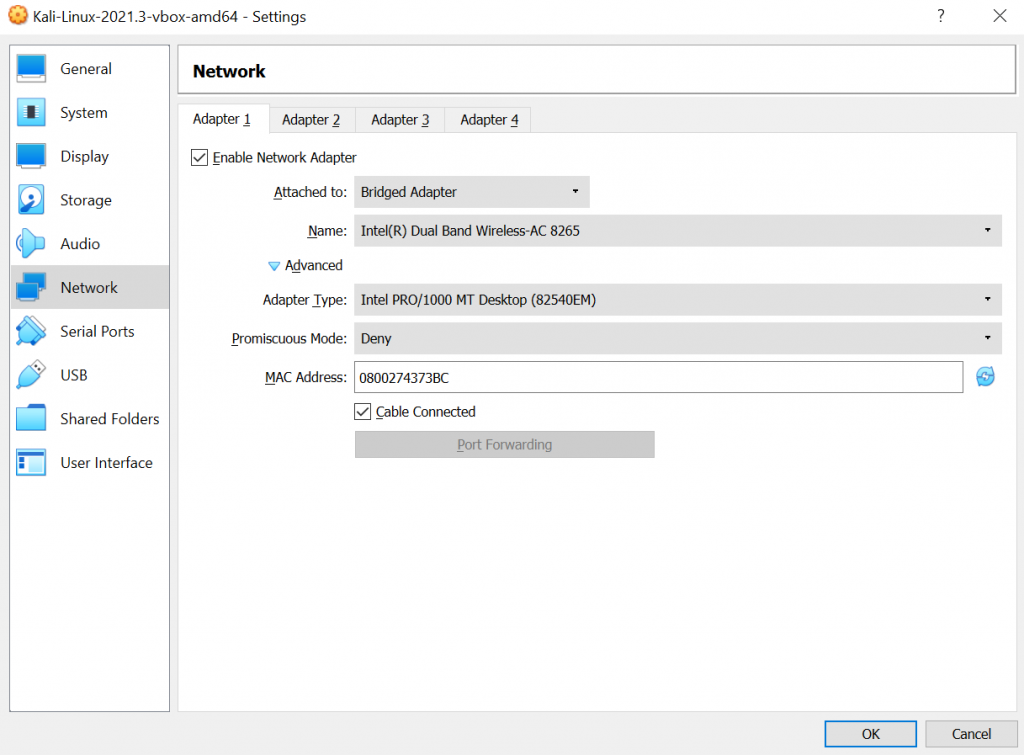
In virtualbox I have this setup of network in Kali Linux:
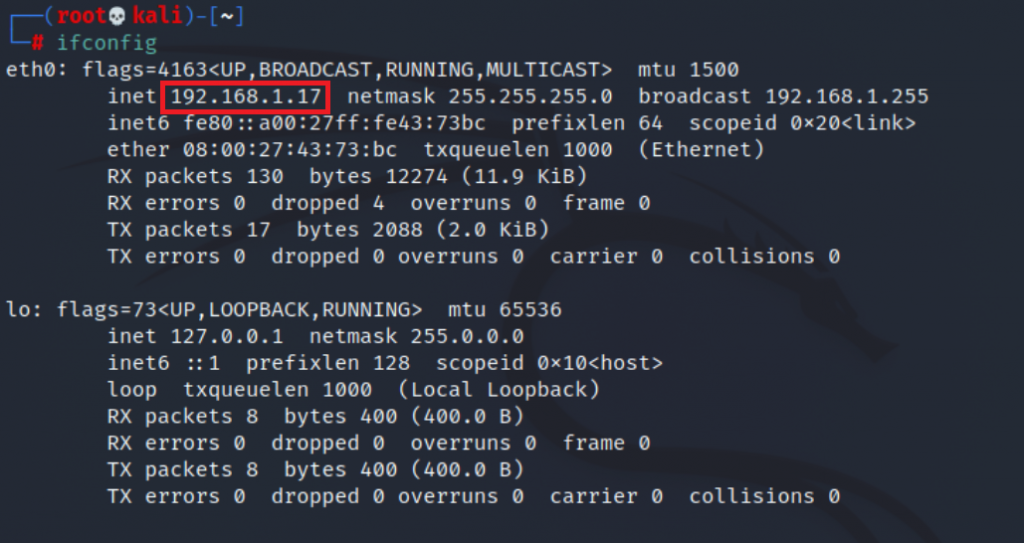
The very use of the tool requires specifying the subnetwork in which we are located. We can check it like this:
Shell
1
# ifconfig
In this case, we can scan network 192.168.1.0/24, so in netdiscover we can use:
Shell
1
# netdiscover -r 192.168.1.0/24
The screen will show the network scanner:
Netdiscover also gives you the option to direct the result to a file, in this case it refreshes the scan every 2 seconds:
You can use more parameters in nmap for more information, however this will significantly increase the scan time. Still, sometimes it’s worth the wait.
In this case, I’ll show you how to get IP from domains. We will save the domains in the file, then, after calling the command, we will get a list of IP addresses along with the names of the domains from which we want to get the IP address.
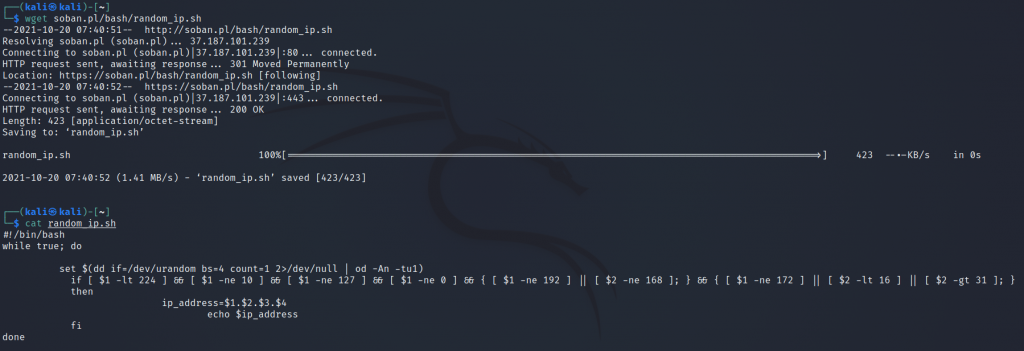
re situations where we can benefit from generating arbitrary IP addresses in bash. In this case, the first octet situations where There are situations where we can benefit from generating arbitrary IP addresses in bash. In this case, the first octet situations where we can benefit from generating arbitrary IP addresses in bash. In this case, the first octet in bash. In this case, the first octet situations where we can benefit from generating arbitrary IP addresses in bash. In this case (224.*.*.* / 10.*.*.* / 127.*.*.* / 0.*.*.* / 192.168.*.* / 172.16.*.* / 172.31.*.*) is not generated. Of course, the script can be adapted to your needs.
In my opinion, one of the most important things about Linux is history. Thanks to it, we know what has been done in the system and we can quickly check what commands were executed in the system. When working on different systems it is very useful to use grep and use (ctrl + r) in the shell to quickly search the command history. However, to make it even more useful, we will try to enlarge the history to 10000 by default, it is 1000 command lines. We will also add a date that will be next to the command issued. If we want to run the history command, just:
Shell
1
$history
To enlarge the history and add a date when executing a given command, you should:
Finally, I would like to introduce a few more tricks that I mentioned, e.g. greping history:
Shell
1
$history|grepcp
Of course, you can use any other command instead of ‘cp’.
Mentioned useful way to search history is to use (ctrl + r). After pressing this combination, we can start writing any command. History will be searched. If we hold ctrl again and press kolena once ‘r‘ we will jump to the command above from the bottom. In my case, as you can see, this is the second command from the bottom, that is:
If you are interested in where the history is saved and in what form, you can view it or delete it from the file:
Shell
1
$vi~/.bash_history
If we accidentally use the wrong command on the system, it makes sense to remove it.
Java Keytool is a command-line tool that is used for managing cryptographic keys, certificates, and keystores in Java-based applications. In Linux, Java Keytool is often used for managing SSL/TLS certificates and securing web applications that run on Java-based servers like Tomcat, GlassFish, and JBoss.
Some of the key features of Java Keytool in Linux include:
Generating key pairs: Java Keytool can be used to generate key pairs, which are used for encryption, decryption, and digital signatures.
Importing and exporting certificates: Java Keytool can import and export certificates, which are used for verifying the authenticity of digital signatures and ensuring secure communications.
Managing keystores: Java Keytool can create, modify, and delete keystores, which are containers for cryptographic keys and certificates.
Configuring SSL/TLS: Java Keytool can be used to configure SSL/TLS connections for Java-based web applications, which are essential for securing data communications.
Some of the most commonly used Java Keytool commands in Linux include:
keytool -genkeypair: This command is used to generate a new key pair.
keytool -import: This command is used to import a certificate into a keystore.
keytool -list: This command is used to list the contents of a keystore.
keytool -delete: This command is used to delete a key or certificate from a keystore.
Overall, Java Keytool is an important tool for managing cryptographic keys and certificates in Java-based applications in Linux, and it is essential for securing web applications and ensuring the privacy and integrity of sensitive information.
Before we begin make copy of old keystor like this:
This script helps to notify me by e-mail about the condition of the disk. Remember to indicate the disk accordingly – in this case it is “/dev/sda” and change the e-mail address from “soban@soban.pl” to your own. Save the script in “/root/checkbadsector.sh“: