The Linux system is a powerful tool that offers users tremendous flexibility and control over their working environment. However, to fully harness its potential, it is worth knowing the key commands that are essential for both beginners and advanced users. In this article, we will present and discuss the most important Linux commands that every user should know.
1. Basic Navigation Commands
pwd– Displays the current directory path you are in:ls– Lists the contents of a directory. You can use the-loption for a detailed view or-ato show hidden files:cd– Changes the directory. For example,cd /home/userwill move you to the/home/userdirectory:mkdir– Creates a new directory:rmdir– Removes an empty directory:
|
1 |
pwd |
|
1 |
ls -a |
|
1 |
cd ~ |
|
1 |
mkdir projects |
|
1 |
rmdir old_files |
2. File Management
cp– Copies files or directories:mv– Moves or renames files/directories:rm– Removes files or directories. Use the-roption to remove a directory with its contents:touch– Creates an empty file or updates the modification time of an existing file:
|
1 |
cp document.txt new_directory/ |
|
1 |
mv file.txt /home/user/new_directory/ |
|
1 |
rm -r old_data |
|
1 |
touch report.txt |
3. Process Management
ps– Displays currently running processes. Use the-auxoption to see all processes:top– Displays a dynamic list of processes in real time:kill– Stops a process by its ID:bgandfg– Manage background and foreground processes:
|
1 |
ps -aux |
|
1 |
top |
|
1 |
kill 1234 |
|
1 |
fg |
4. User and Permission Management
sudo– Allows a command to be executed with administrator privileges:chmod– Changes permissions for files/directories:chown– Changes the owner of a file/directory:useraddanduserdel– Adds and removes users:
|
1 |
sudo apt update |
|
1 |
chmod 755 script.sh |
|
1 |
chown admin:admin file.txt |
|
1 |
useradd janek |
5. Networking and Communication
ping– Checks the connection with another host:ifconfig– Displays information about network interfaces:ssh– Connects remotely to another computer:scp– Copies files over SSH:
|
1 |
ping 192.168.1.1 |
|
1 |
ifconfig |
|
1 |
ssh user@192.168.1.2 |
|
1 |
scp file.txt user@host:/home/user/ |
6. Command Usage Examples
Below is an example of using several discussed commands:
chmod– Changes permissions for files/directories:chown– Changes the owner of a file/directory:useraddanduserdel– Adds and removes users:
|
1 |
chmod 755 script.sh |
|
1 |
chown admin:developers logs.txt |
|
1 |
useradd janek |
7. Disk and File System Management
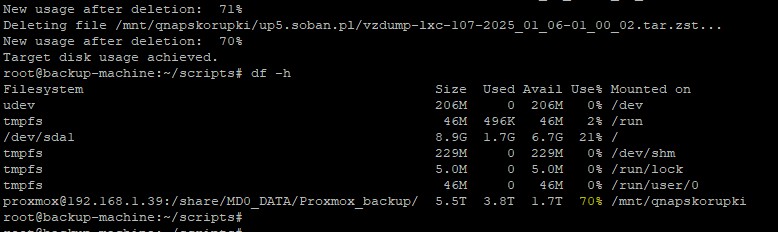
df– Displays information about disk space availability:du– Shows the size of files and directories:mount– Mounts a file system:umount– Unmounts a file system:
|
1 |
df -h |
|
1 |
du -sh documents |
|
1 |
mount /dev/sdb1 /mnt/external |
|
1 |
umount /mnt/external |
8. Searching for Files
find– Searches for files in the system:locate– Quickly searches for files in the system:grep– Searches for patterns in files:which– Finds the full path to an executable file:
9. Communicating with the System
echo– Displays text on the screen:cat– Displays the contents of a file:more– Displays the contents of a file page by page:less– Similar to more, but offers more navigation options:man– Displays the user manual for a command:
10. Working with Archives
tar– Creates or extracts archives:zip– Creates a ZIP archive:unzip– Extracts ZIP files:tar -xvzf– Extracts a TAR.GZ archive:gzip– Compresses files in .gz format:gunzip– Extracts .gz files:
11. System Monitoring
uptime– Displays the system uptime and load:dmesg– Displays system messages related to boot and hardware:iostat– Shows input/output system statistics:free– Displays information about RAM:netstat– Displays information about network connections:ss– A modern version of netstat, used for monitoring network connections:
12. Working with System Logs
journalctl– Reviews system logs:tail– Displays the last lines of a file:logrotate– Automatically manages logs:
13. Advanced File Operations
ln– Creates a link to a file:xargs– Passes arguments from input to other commands:chmod– Changes permissions for files/directories:chattr– Changes file attributes:
Linux offers a wide array of commands that allow for complete control over the computer. Key commands such as ls, cd, cp, and rm are used daily to navigate through the file system, manage files, and directories. To effectively master these commands, it’s best to start with those that are most useful in everyday work. For instance, commands for navigating directories and managing files are fundamental and require practice to become intuitive. Other commands, such as ps for monitoring processes, ping for testing network connections, or chmod for changing permissions, are also worth knowing to fully leverage the power of the Linux system.
To learn effectively, it’s advisable to start by experimenting with commands in practice. Creating files, directories, copying, and deleting data allows for familiarity with their operation. Over time, it’s worthwhile to start combining different commands to solve more advanced problems, such as monitoring processes, managing users, or working with system logs. One can also use documentation, such as man or websites, to delve into the details of each command and its options.
Remember, regular use of the terminal allows for learning habits that make handling the Linux system more natural. Frequent use of commands, solving problems, and experimenting with new commands is the best way to master the system and fully utilize it.
Linux is indeed a powerful tool that provides great control over the system… but remember, don’t experiment on production! After all, experimenting on a production server is a bit like playing Russian roulette — only with bigger consequences. If you want to feel like a true Linux wizard, always test your commands in a development environment. Only then will you be able to learn from mistakes instead of searching for the cause of several gigabytes of data disappearance. And if you don’t know what you’re doing, simply summon your trusty weapon: man!