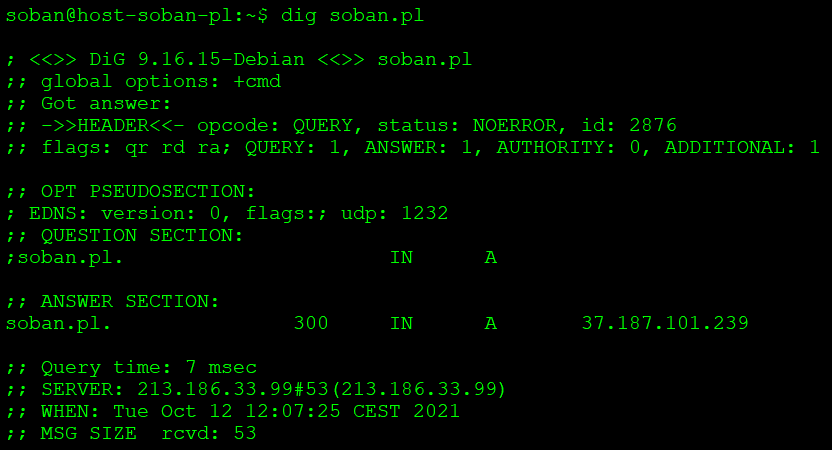
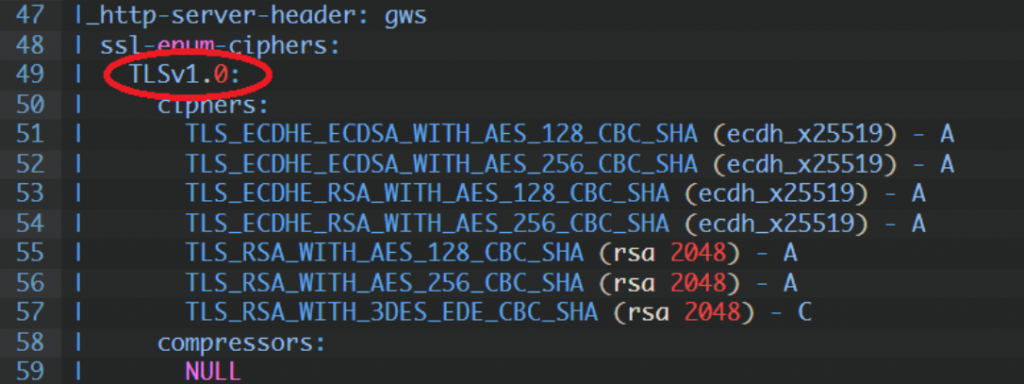
Checking SSL certyfikat date using nmap and curl
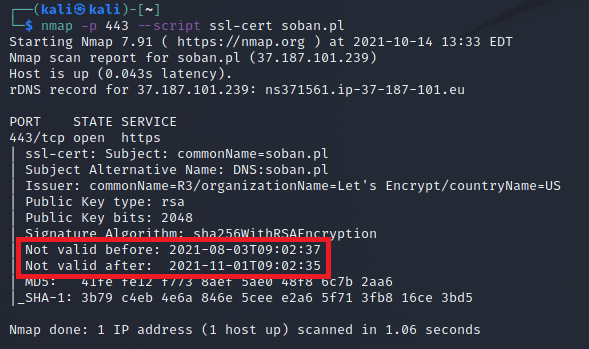
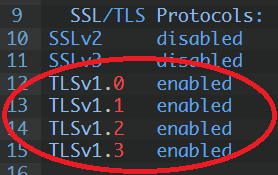
This time I will use Kali Linux it is a great distro for pentesters. After all, nothing prevents you from using another distribution, such as Debian Linux. Sometimes we need to check the certificate issuance date. Nmap and curl are a very good tool for this.Both of these tools allow for advanced analysis of the […]